

iOS 12 and macOS Mojave: What is Continuity Camera and how to use it
consent.ads.queue.push(function(){
try {
IDG.GPT.addDisplayedAd(“gpt-superstitial”, “true”);
$(‘#gpt-superstitial’).responsiveAd({screenSize:’971 1115′, scriptTags: []});
IDG.GPT.log(“Creating ad: gpt-superstitial [971 1115]”);
}
catch (exception) {
console.log(“Error with IDG.GPT: ” + exception);
}
});
The Mac can use an iOS device to import photos or scans directly into documents.

IDG
“);
});
try {
$(“div.lazyload_blox_ad”).lazyLoadAd({
threshold : 0, // You can set threshold on how close to the edge ad should come before it is loaded. Default is 0 (when it is visible).
forceLoad : false, // Ad is loaded even if not visible. Default is false.
onLoad : false, // Callback function on call ad loading
onComplete : false, // Callback function when load is loaded
timeout : 1500, // Timeout ad load
debug : false, // For debug use : draw colors border depends on load status
xray : false // For debug use : display a complete page view with ad placements
}) ;
}
catch (exception){
console.log(“error loading lazyload_ad ” + exception);
}
});
Over the years, the task of digitizing printed photos and documents has gotten a lot easier. Scanners used to be main tool for the job, but now we have smartphone cameras. With Continuity Camera, you can use your iPhone or iPad to directly import photos or documents scans (like receipts) into a file that you’re creating on your Mac.
How it works: Continuity Camera connects your Mac to your iOS device. You can then take a photo or snap a picture of a document, and that image is then automatically imported into the file you are working on. It’s that simple.
Continuity Camera’s requirements
- Mac: macOS Mojave. iOS device: iOS 12.
- Currently, Continuity Camera works with the Mojave bundled apps like Notes, TextEdit, and Mail. It also works with Apple’s Pages and Keynote. For your favorite third-party apps, look for updates from the developers.
- The Mac and iOS devices need to be logged into the same Apple ID.
- The Mac and iOS devices need to be on the same Wi-Fi network.
How to take photos using Continuity Camera in macOS Mojave and iOS 12
Here’s how to use Continuity Camera to insert a photo into a document you’re creating on a Mac. Pages is used in the instructions here, and they’re the same steps for any of the bundled Apple apps, such as Notes, Mail, and TextEdit.
1. In your document, place the cursor at the point where you want the photo to be placed.
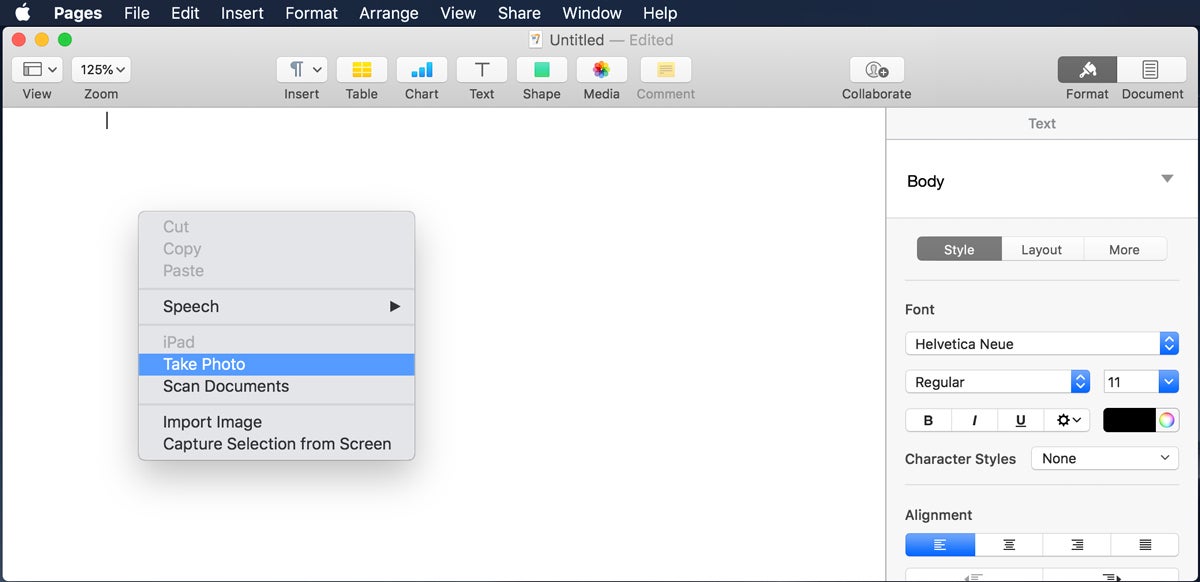
2. Right-click (or tap with two fingers on the Trackpad). A pop-up menu will appear.
3. Select Take Photo.
 IDG
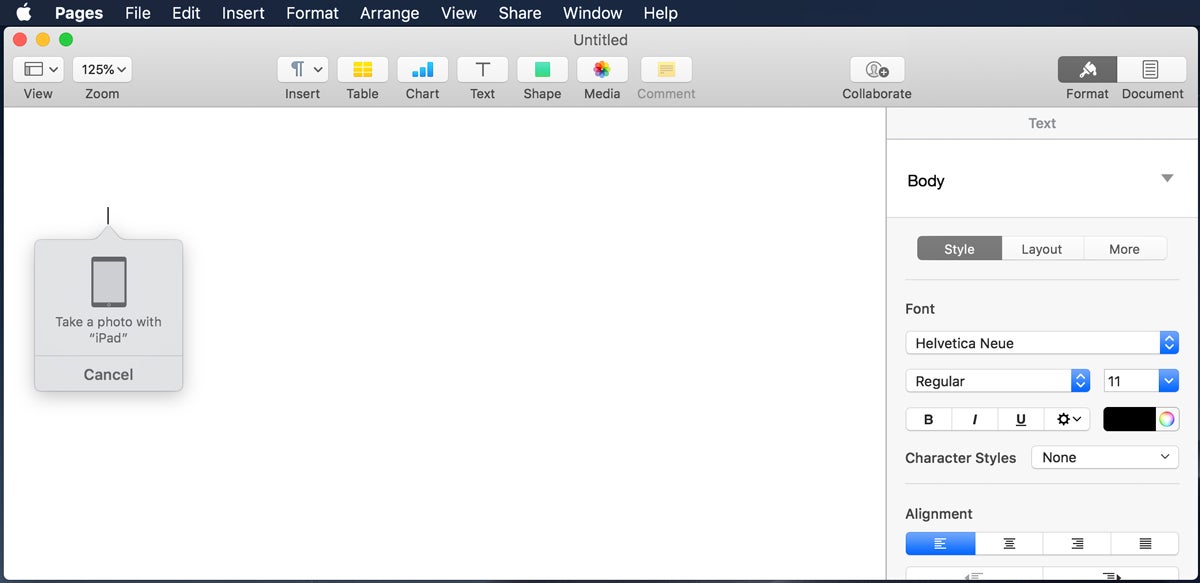
IDG4. An indicator will appear in your document, instructing you to take a photo with your iOS device.
 IDG
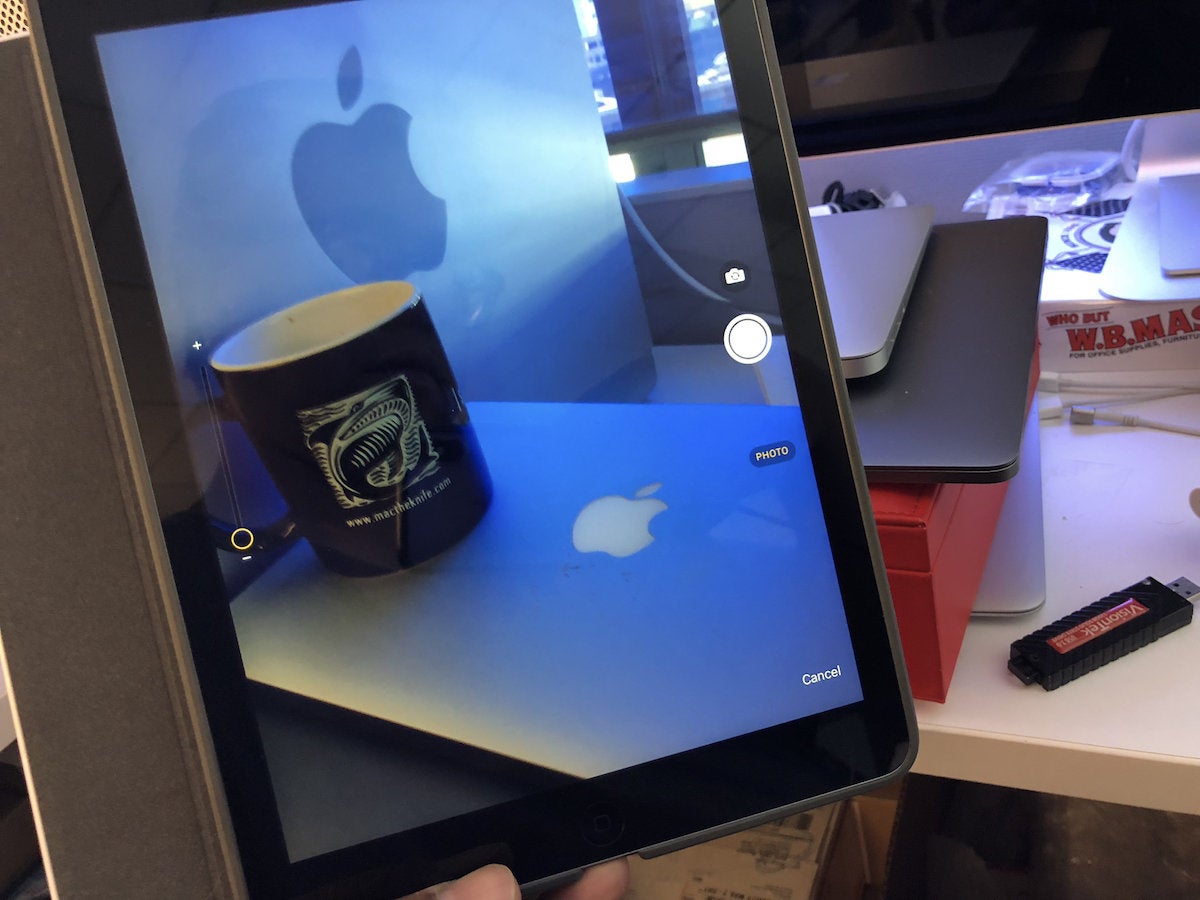
IDG5. Go to your iOS device and open the Camera if it’s not opened. Frame your document. Notice that your camera options are restricted to Photo. You can’t take a Square shot or shoot Video. (If this changes in future versions of Mojave, this tutorial will be updated.)
Shoot your picture.
 IDG
IDG6. Go back to the Mac and your document. The picture you just took should appear. You can now edit the picture and document as you wish.
 IDG
IDGHow to scan documents using Continuity Camera in macOS Mojave and iOS 12
Here’s how to use Continuity Camera to scan a document for a Mac. Notes (In Dark Mode) is used in the instructions here, and they’re the same steps for any of the bundled Apple apps, such as Pages, Mail, and TextEdit.
1. In your document, place the cursor at the point where you want the scan to be placed.
2. Right-click (or tap with two fingers on the Trackpad). A pop-up menu will appear.
3. Select Scan Documents.
 IDG
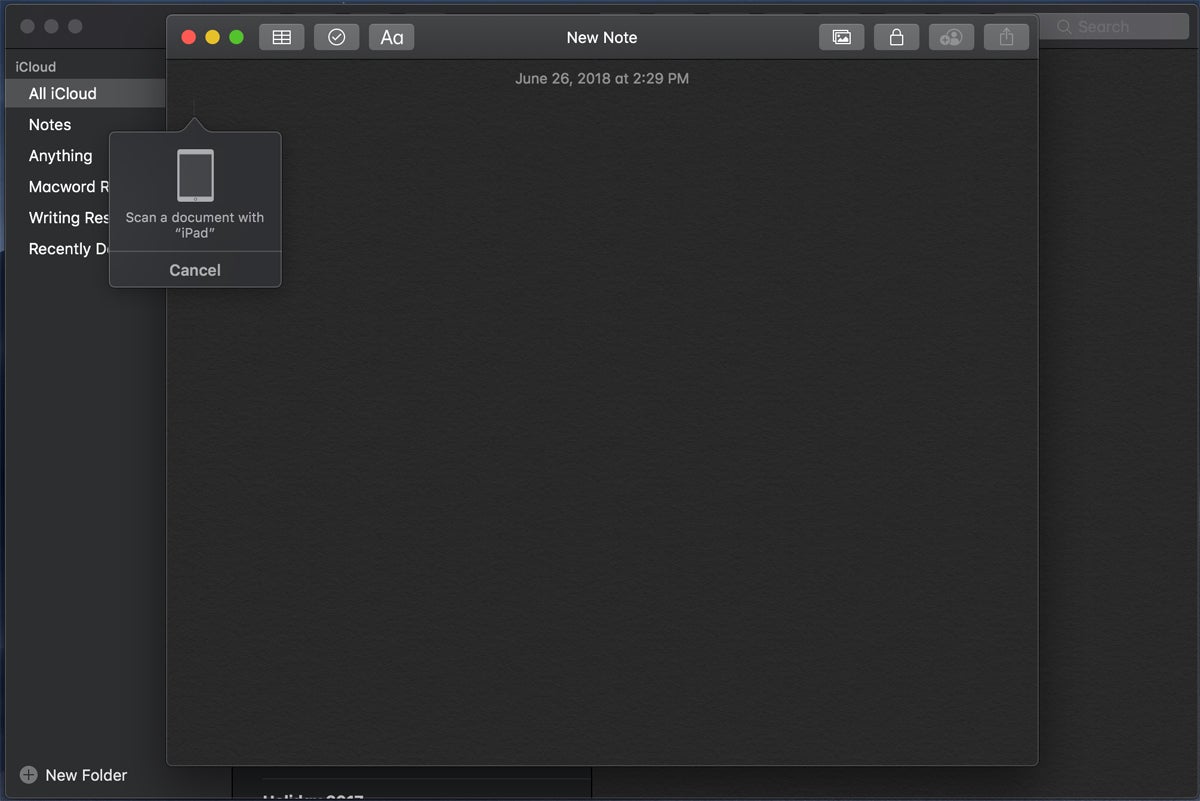
IDG4. An indicator will appear in your file, instructing you to scan a document with your iOS device.
 IDG
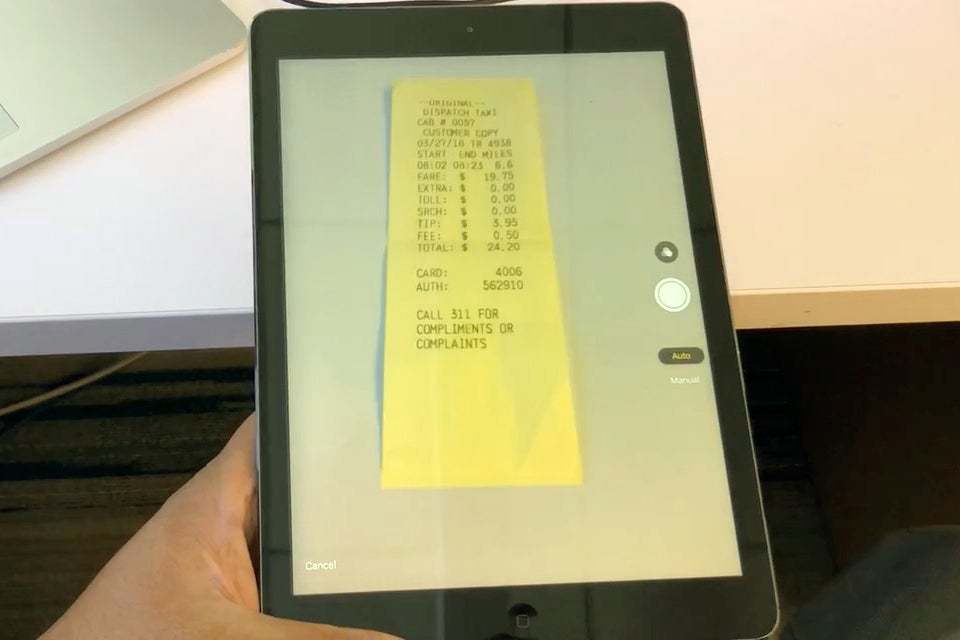
IDG5. Go to your iOS device and open the Camera if it’s not opened. Frame your shot, then press the shutter button.
 IDG
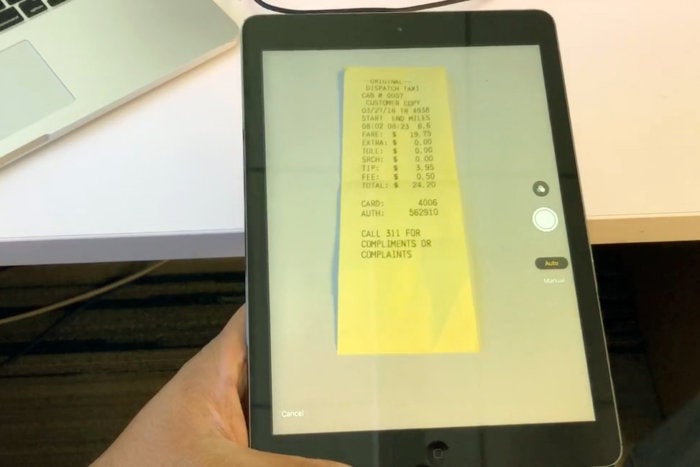
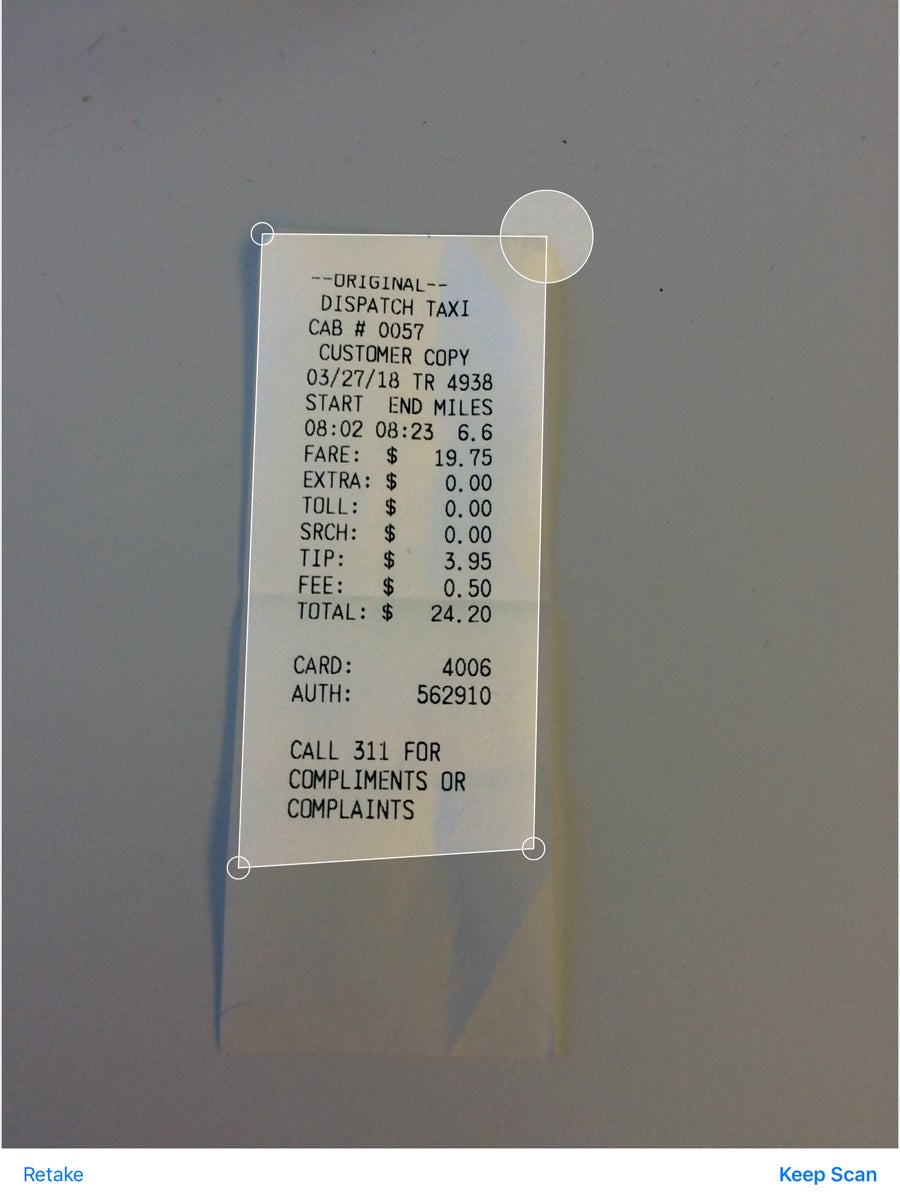
IDG6. The iOS Camera app will go to a screen of your document in a selection box. This is where you can select the area you want scanned. Click and drag the corners until the area you want scanned is inside the box. Then tap Keep Scan if you want the scan, or tap Retake if you want to scan the document again.
 IDG
IDG7. The iOS Camera will go back to scanner mode if you want to scan more documents; you’ll essentially repeat steps 5 and 6 for each scan. When you’re done, tap Save.
 IDG
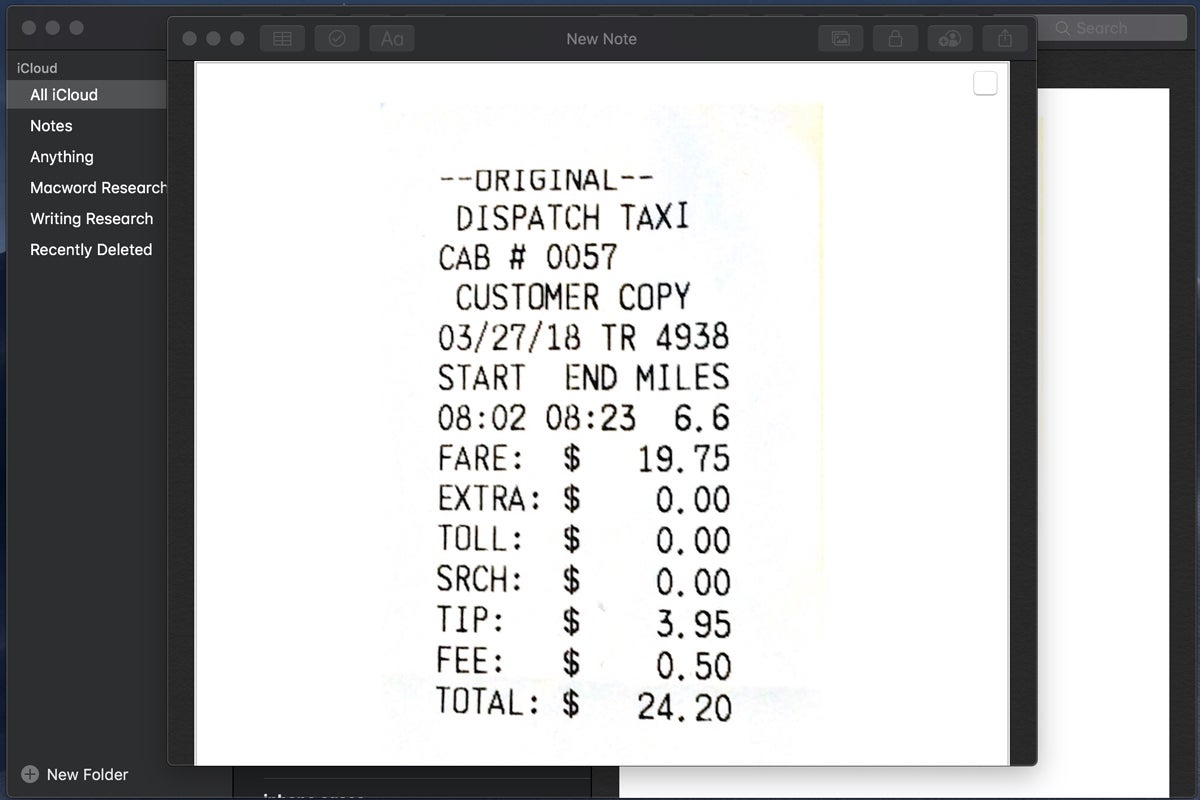
IDG8. Go back to the Mac and your document. The scan you just took should appear. Note than the scans are not saved on your iOS device.
 IDG
IDG